The equaliser is the most fundamental mixing tool. Before any compressor, reverb or creative effect, EQ is what gives each instrument its space in the frequency spectrum and allows all the elements of a mix to coexist with clarity. Intelligent EQ use is not about making each track sound perfect in isolation — it is about making everything sound right together.
What the equaliser does
An equaliser is a processor that modifies the frequency balance of an audio signal: it can attenuate (cut) or boost the level of certain frequencies while leaving the rest untouched. Its role in the mix is twofold:
- Tonal correction: Removing problematic frequencies that muddy the mix, unwanted resonances or low-frequency noise that contributes nothing musical.
- Frequency separation: Giving each instrument its own "slot" in the frequency spectrum, reducing clashes between elements competing in the same range and improving the clarity and definition of each.
Types of EQ filter
Every equaliser operates through filters. Filters are the building blocks of any EQ, and each type behaves differently across the spectrum:
Bell filter (Peak)
The most versatile filter. It boosts or cuts a symmetrical area around a centre frequency, in a bell shape. Its three parameters are:
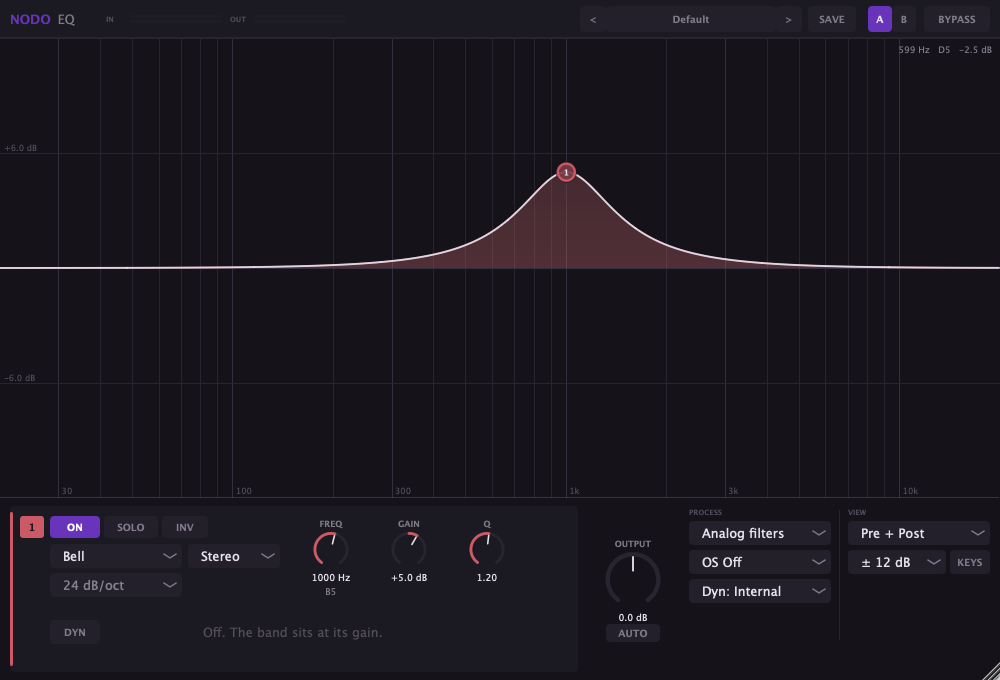
- Frequency: The centre of the affected area.
- Gain: How much is boosted or cut (in dB).
- Q (bandwidth): How wide or narrow the bell is. High Q = narrow, surgical curve. Low Q = wide, musical curve.
It is the reference filter for surgical corrections (resonances, problematic frequencies) with high Q, and for musical tonal adjustments (adding brightness, body or presence) with low Q.
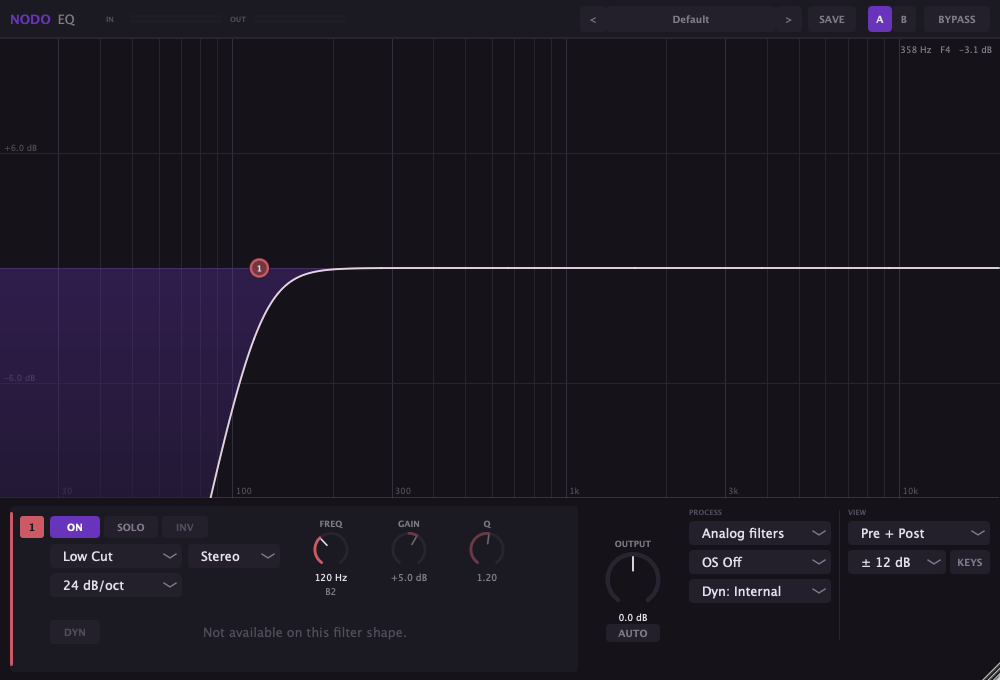
High-pass filter (HPF)
Removes frequencies below a cutoff point and allows the higher ones through. It is one of the most used filters in mixing: applied to almost every channel to clean the low-frequency range from elements that do not need it (vocals, guitars, cymbals, pad synthesisers). Its slope is measured in dB per octave: 12 dB/oct is gentle, 24 dB/oct is steeper.
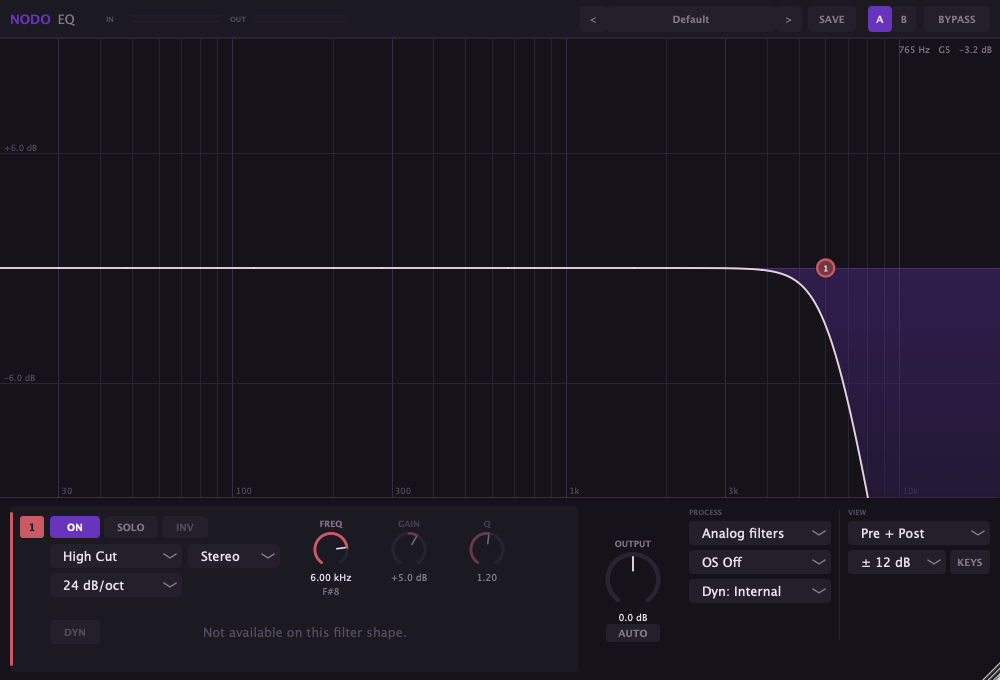
Low-pass filter (LPF)
Does the opposite: removes frequencies above the cutoff point and allows the lower ones through. Less commonly used than the HPF, but very useful for reducing high-frequency content from elements that do not need brightness (such as a kick drum or a synthesised bass) or for adding warmth and darkening the sound of a secondary element.
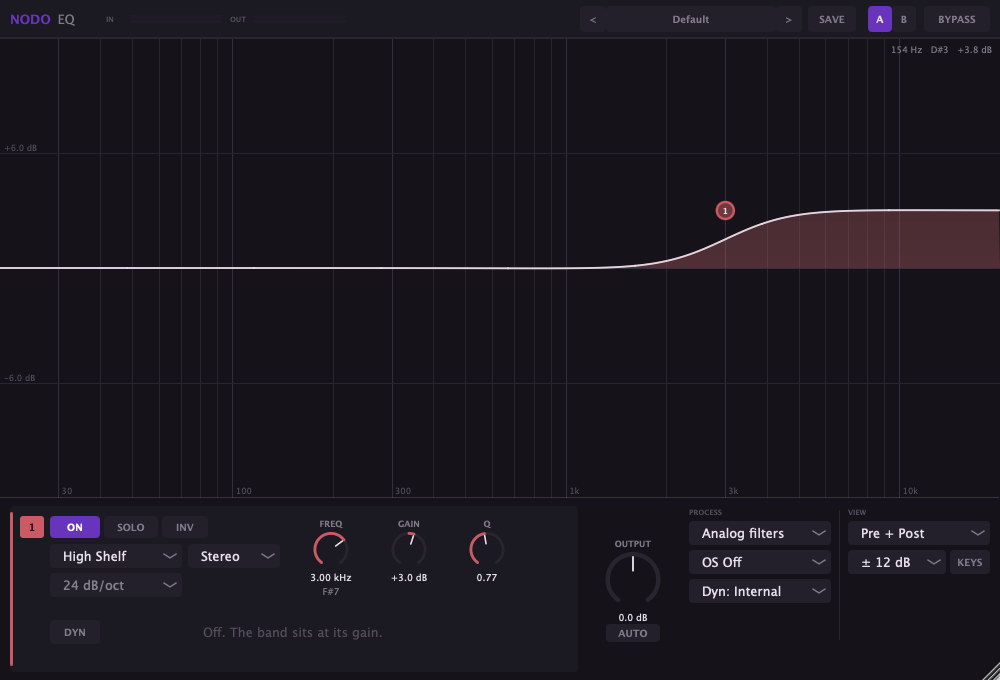
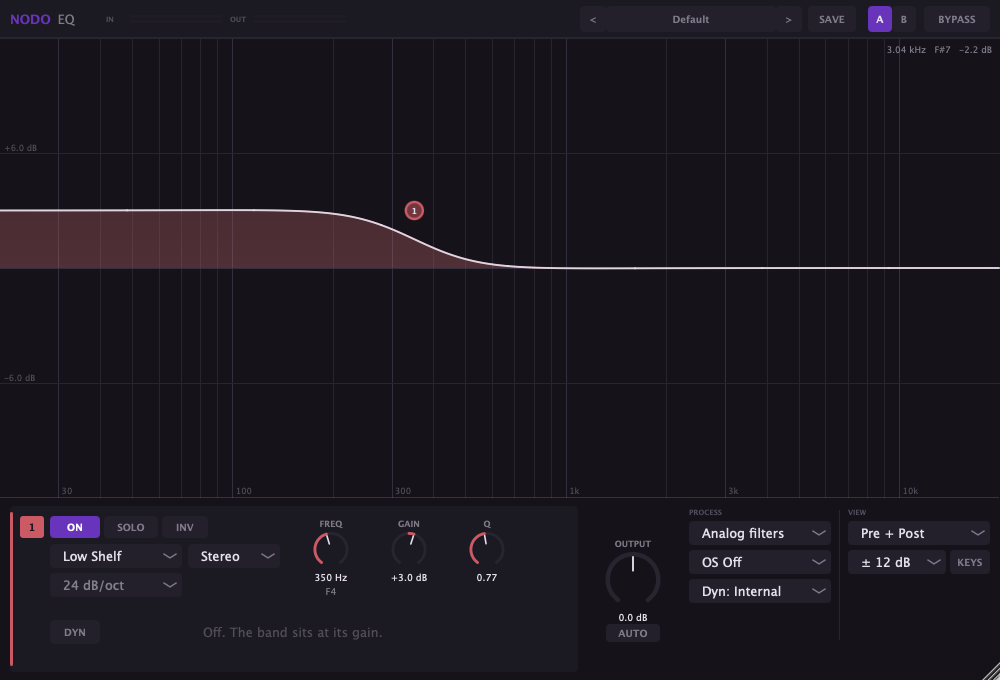
Shelving filter
Boosts or attenuates all frequencies above (high shelf) or below (low shelf) a transition frequency, in a smoother and more gradual way than a cut filter. The high shelf is the most natural way to add or remove brightness from an instrument; the low shelf, to add or remove weight in the bass. Present on virtually all classic analogue equalisers (Neve, SSL, API).
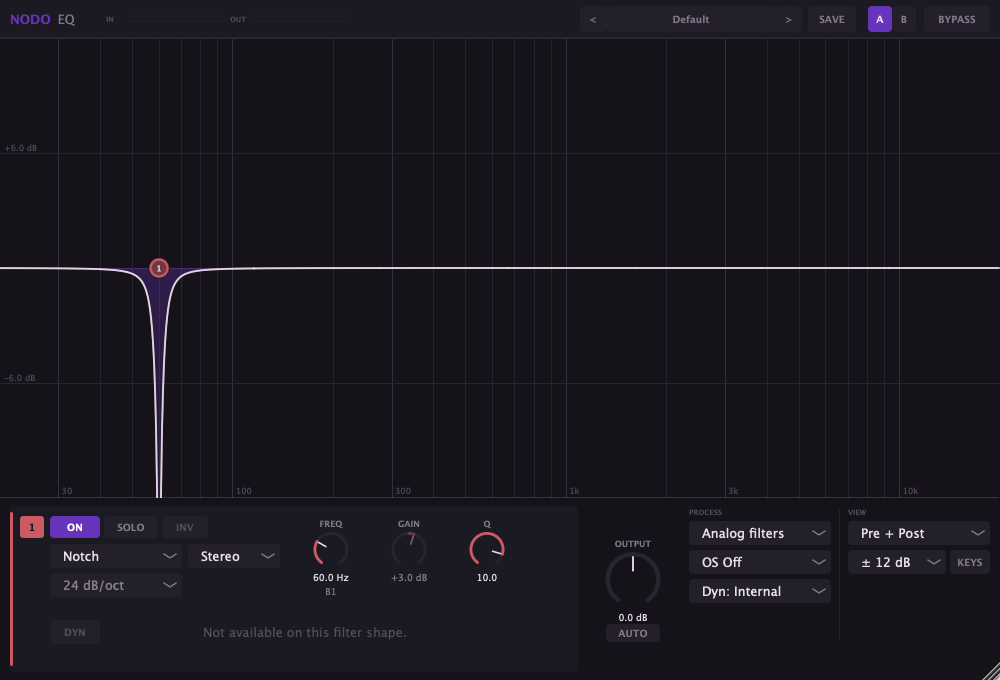
Notch filter
An extreme variant of the bell filter with very high Q and negative gain: a very narrow and deep cut at a very specific frequency. Used to eliminate very precise resonances (such as the hum of an amplifier at 50 Hz or 60 Hz, or a monitor feedback frequency) without affecting neighbouring frequencies at all.
Types of equaliser
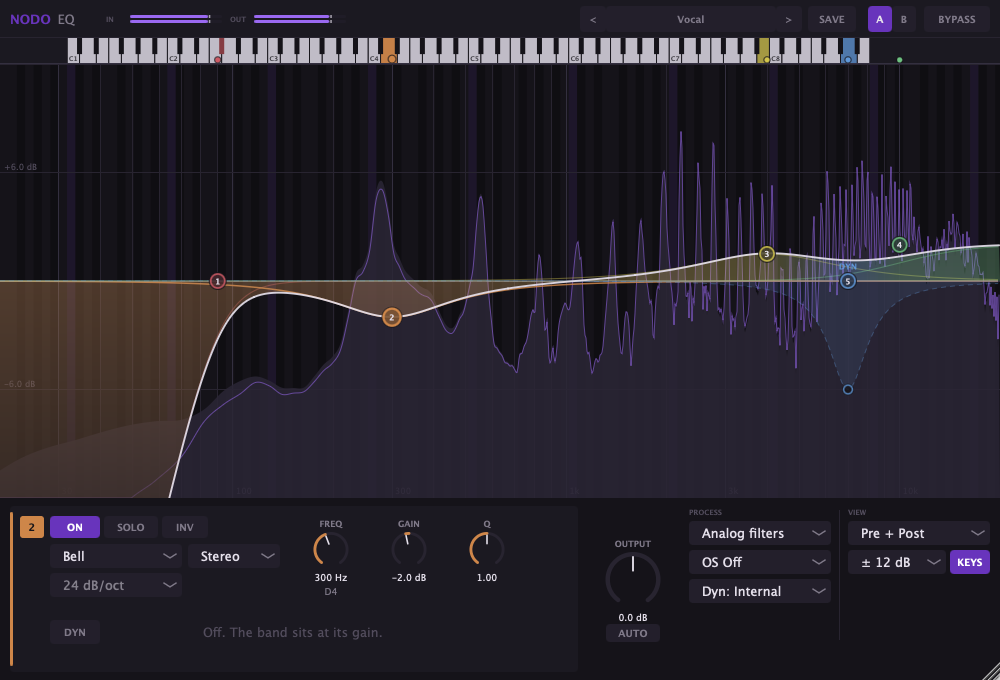
Parametric equaliser
The parametric equaliser is the most precise and versatile. It allows the three parameters of each band (frequency, gain and Q) to be controlled independently. It is the professional mixing standard: it gives total control over which frequency is affected, by how much and with what bandwidth. Reference plugins in this format include the FabFilter Pro-Q and iZotope Neutron EQ, which also feature real-time spectrum analysers.
To get started, we recommend trying our free plugin Nodo EQ, a 24-band parametric plugin.
Graphic equaliser
The graphic equaliser has a fixed number of bands (typically 31) at predefined frequencies, each controlled by a sliding fader. Its Q is fixed and non-adjustable. Very visual and intuitive, but far less flexible than the parametric. Its main use is PA system correction in live sound and room acoustic response adjustment, not individual channel mixing.

Dynamic equaliser
A dynamic equaliser is an EQ band whose gain varies automatically based on the signal level at that frequency: it only acts when the signal in that band exceeds a defined threshold. More transparent than a static EQ because it only corrects the problem when it appears. Used to control resonances that are only problematic at certain levels, such as vocal sibilance or kick drum mid-frequency peaks.
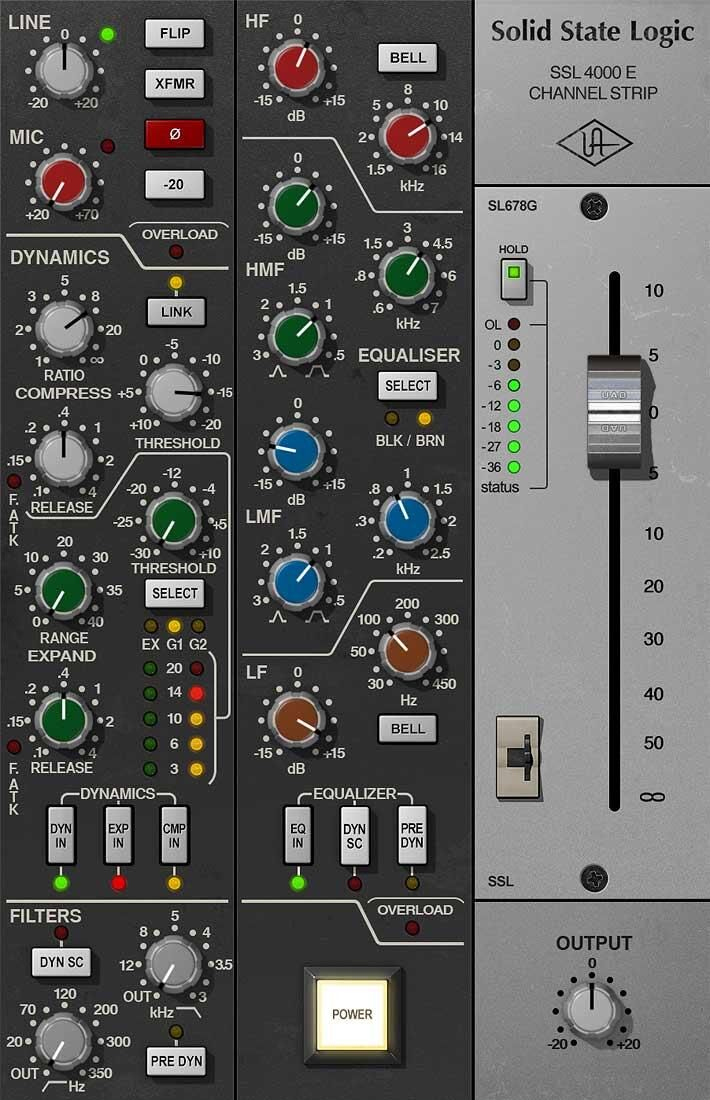
Character analogue equalisers (Neve, SSL, Pultec)
Beyond the types above, there is a category of equalisers — primarily in plugin format as emulations of classic hardware — that add their own tonal colouration in addition to the equalisation. The Neve 1073, SSL 4000, API 550 and the Pultec EQP-1A are references that have a specific sonic character even with all gain parameters at zero, due to the colouration of their transformers and analogue circuits. Their plugin emulations are widely used in mixing for that additional character.
Subtractive EQ vs. additive EQ
In professional mixing there is a widely held principle: subtract before you add.
Subtractive EQ
This involves cutting (reducing) problematic frequencies: resonances, frequencies clashing between instruments, ranges that muddy the mix or frequencies that an instrument does not emit significantly. It is the priority technique because:
- It does not raise the overall channel level (does not consume headroom).
- It does not create new frequency clashes with other elements.
- It is more musical: removing what is excessive usually sounds more natural than adding what is missing.
The principle is: if something sounds bad, it is probably because there is too much of something, not because something is missing.
Additive EQ
This involves boosting frequencies to add brightness, body, presence or warmth to an instrument. Useful but should be applied with judgement:
- Boosting a frequency raises the overall channel level and can create new clashes with other elements already occupying that area.
- The Q should be wider (lower) for boosts than for cuts: boosts sound more natural with broad curves.
- If a large boost (+6 dB or more) is needed to achieve the desired sound, the problem is likely in the recording, not in the mix.
The sweep technique
The sweep technique is the most effective method for locating problematic frequencies that do not show clearly on the spectrum analyser but are clearly audible:

- Activate a bell band with high Q and a large boost (+10 to +15 dB).
- Move the centre frequency slowly from left to right across the full spectrum.
- Listen until the area that sounds worst, most unpleasant or most resonant is found.
- Once located, reduce the gain to attenuate only what is needed (typically between -3 and -8 dB).
- Use the bypass button to compare before and after.
It is important not to be distracted by the visual appearance of the spectrum analyser: the ear is the reference, not the screen.
Frequency reference ranges by instrument
Each instrument has frequency ranges where it concentrates its fundamental energy, harmonics and presence. Knowing these ranges is the starting point for EQ decisions, though what is heard must always take priority over any preset rule.
Frequency reference ranges in mixing
- Sub-bass (20–80 Hz): Physical frequencies of kick drum and bass. Hard to control in untreated rooms. Require HPF on almost everything else.
- Bass (80–250 Hz): Kick drum body, bass guitar foundation, instrument warmth. The range where 'mud' most easily accumulates.
- Low mids (250–500 Hz): Warmth or muddiness. Many instruments have problematic resonances here. A gentle cut across several channels clarifies the mix significantly.
- Mids (500 Hz–2 kHz): Presence and intelligibility of vocals and guitars. Boosting here adds presence; cutting adds space and "depth".
- Upper mids (2–6 kHz): Snare attack, vocal articulation, guitar definition. Very sensitive to the ear; small boosts can quickly become aggressive.
- Highs (6–12 kHz): Presence and brightness of cymbals, vocals and acoustic guitar. A gentle high shelf here can "air out" the whole mix.
- Ultra-highs (12–20 kHz): Air, extreme brightness and extension. A very gentle high shelf on the vocal bus or main bus can add a sense of openness.
Practical EQ principles in mixing
- Apply HPF to almost everything: Vocals, guitars, cymbals, pad keyboards, strings. Kick drum and bass are the main exceptions. Cleaning unnecessary low end from every channel adds overall clarity to the mix without any additional effort.
- EQ in context: Always make EQ decisions with the full mix playing, not with the channel soloed. An instrument may sound fine in solo but clash with another element in the full context.
- Narrow Q for cuts, wide Q for boosts: Surgical cuts work better with high Q; musical boosts work better with low Q.
- Bypass is your best tool: Continuously comparing the channel with and without EQ prevents the trap of "EQing for the sake of it" simply because the EQ is switched on.
- Frequency separation works both ways: If the guitar clashes with the piano's mids, you can cut the guitar in that area, boost the piano, or do both. The solution that least affects the tonal character of each instrument is always preferable.