A mixing console is not simply a device that adds signals together: it is a routing system. Each channel can be sent to multiple destinations simultaneously, processed in different ways in parallel and grouped with others to simplify control during the show. Understanding how signal flows internally — and where it can be directed — is the foundation of any professional live sound work.
The mix bus: the fundamental concept
A mix bus is an internal signal path inside the console to which one or more channels are routed. It functions as a collector: it receives the signal from all assigned channels, sums them together and sends them to a destination (a physical output, another bus or a processor).
The clearest analogy is a plumbing system: each channel is a tap, and the bus is the main pipe that collects all the water before sending it to its destination. Depending on which bus each channel is assigned to, the signal will reach the audience, the stage monitors, a recording system or an outboard processor.
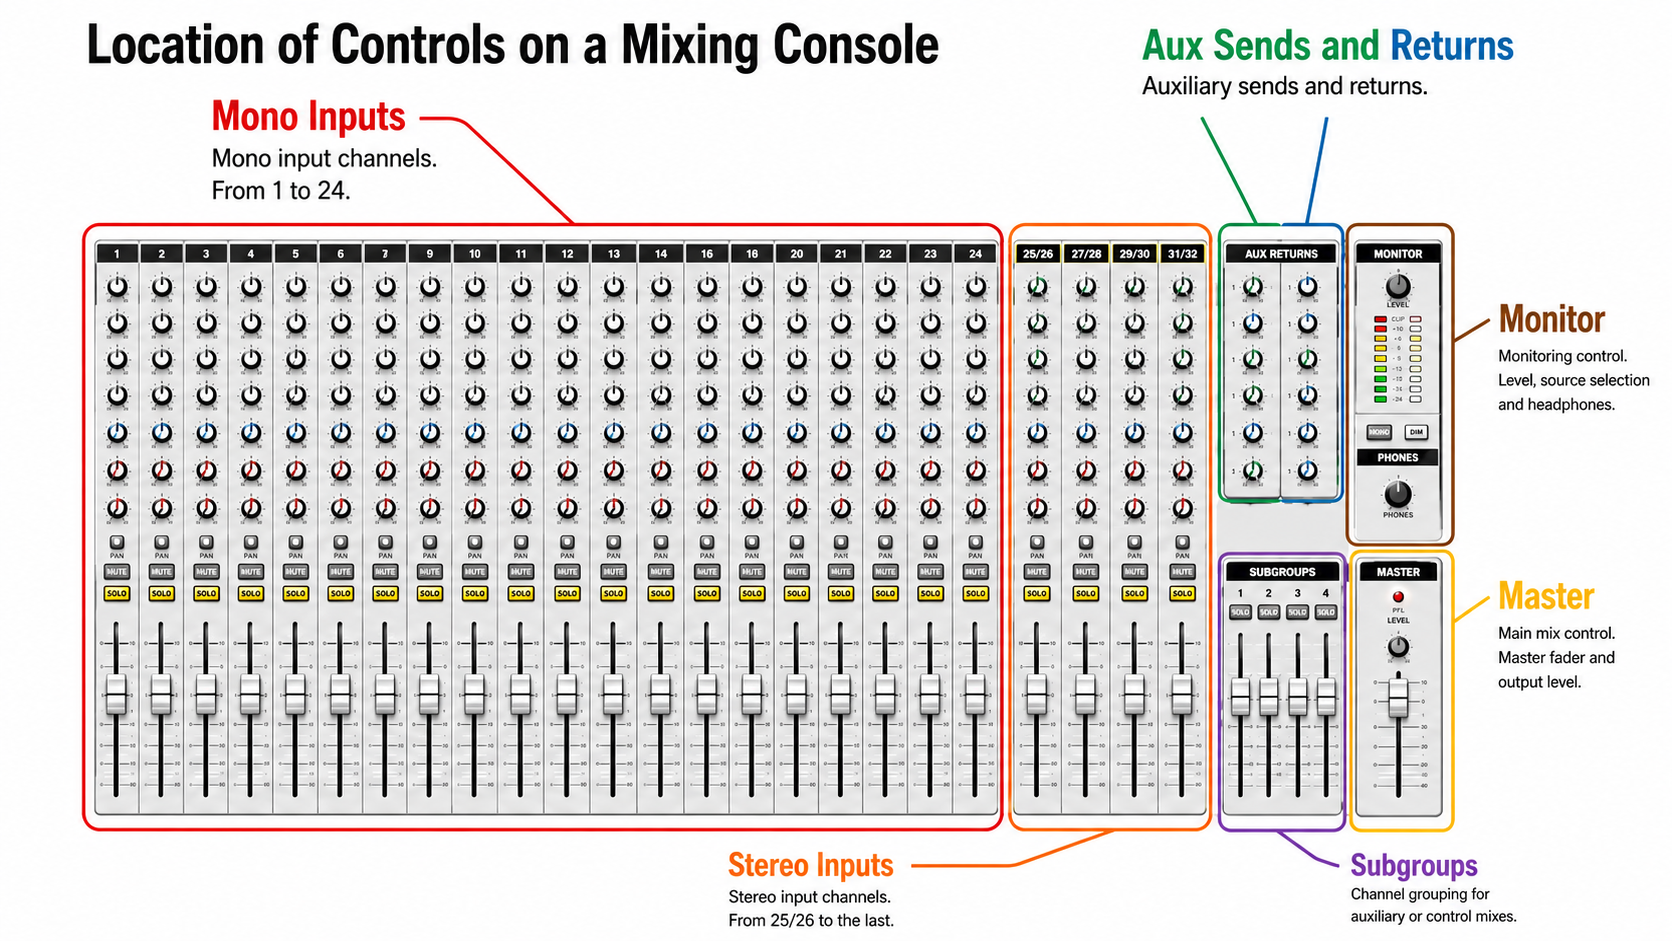
The main buses on a live console are:
- Main bus (L/R or Master): The summed mix sent to the PA system.
- Subgroups: Intermediate buses that group sections of the mix.
- Auxiliary buses (Aux): Parallel derivations for monitors, effects or recording.
The main bus (Master or L/R)
The main bus — also called Master, Main Out or L/R — is the sum of all channels and subgroups on the console, representing the FOH (Front of House) mix: what the audience hears. Its signal is sent to the PA system through the console's main outputs.
The master fader controls the overall level of this mix. It is the last level control before the signal reaches the amplifier and speakers. Any adjustment to the master fader affects everything sounding through the PA simultaneously, without altering the internal balance between channels.
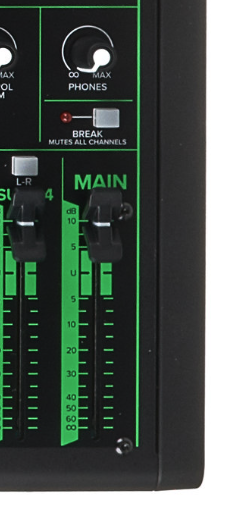
It is essential to distinguish between the mix reaching the audience (main bus) and the mixes heard by the musicians on stage (auxiliary monitor buses). They are completely independent signal paths: what goes up or down in the FOH does not necessarily change what the performers hear.
Subgroups: section-level control
When a console handles many channels, controlling the level of each one individually during a show can become unmanageable. Subgroups solve this problem: they allow several channels to be grouped into a single intermediate bus with its own fader, so that an entire section can be raised or lowered with a single movement.
The signal flow through a subgroup is as follows: channels are assigned to the subgroup (instead of — or in addition to — going directly to the main bus). The subgroup sums all those signals, allows them to be processed together, and then sends them to the main bus.
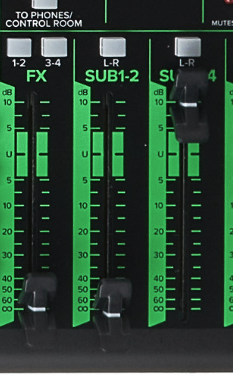
The most common groupings at a concert are:
- Drum subgroup: All kit microphones (kick, snare, toms, overheads) are grouped into a stereo subgroup. Once the internal drum sound is balanced, a single fader movement manages the entire kit's level in the mix.
- Vocals subgroup: Lead vocal and backing vocals. Allows the overall vocal level to be controlled with one fader and group compression to be applied to tie the vocals together.
- Guitar subgroup: Useful with two or more guitarists, to balance the section internally and then manage it as a block in the mix.
Subgroups are also the ideal point for group processing: a compressor on the drum subgroup affects all kit microphones together, giving cohesion and "glue" to the sound. An equaliser on the vocal subgroup adjusts the tone of all voices simultaneously without disturbing the internal balance between them.
Example subgroup layout for a rock band
- Subgroup 1-2 (Stereo): Full drum kit (kick, snare, toms, overheads).
- Subgroup 3-4 (Stereo): Bass guitar + DI.
- Subgroup 5-6 (Stereo): Electric guitars.
- Subgroup 7-8 (Stereo): Lead vocal + backing vocals.
- All subgroups → Main bus (L/R).
Auxiliary buses: parallel mixes
Auxiliary buses (aux sends) are the most versatile tool on the console in a live context. Unlike subgroups, which receive the output signal from channels, auxiliary buses receive an independent copy of each channel's signal without interrupting its flow to the main bus. This allows completely independent mixes to be built in parallel with the FOH mix.
Each channel has a send knob for every available auxiliary bus. Turning that knob determines how much of that channel's signal is sent to the corresponding auxiliary. The result at the auxiliary output is a mix built exclusively from each channel's individual send level.
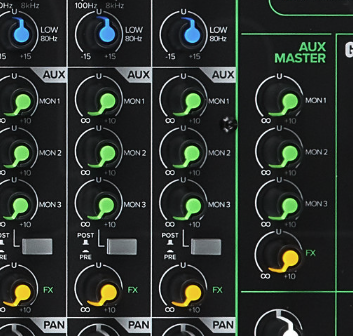
The two fundamental uses of auxiliary buses in live sound are:
Auxiliary sends for stage monitors
Each stage monitor — or each in-ear system — receives its own independent mix, built from a different auxiliary bus. Musician A needs to hear more of their voice and the bass; musician B wants more guitar and less drums. Each of those requirements is addressed by adjusting each channel's send level to the corresponding auxiliary.
Monitor auxiliary sends work in pre-fader mode: they tap the signal from each channel before it passes through the main fader. This ensures that level adjustments the engineer makes in the FOH mix do not affect what the musicians hear on stage. If the engineer lowers the guitar in the main mix because it is too loud for the audience, the guitarist will continue to hear it at the same level in their monitor.
Auxiliary sends for effects (send/return)
Time-based processors such as reverbs and delays are typically connected via a send and return scheme: the signal is sent from an auxiliary bus to the processor, and the processed signal (the effect) returns to the console through a separate return channel. This allows the same effect to be applied to multiple channels using a single processor, with the amount of effect per channel controlled individually from each send knob.
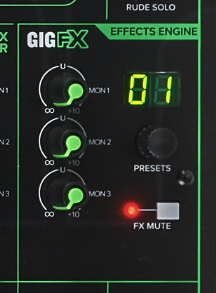
Effects auxiliary sends work in post-fader mode: they tap the signal after the channel fader. This way, when a channel fader is lowered, the send to the effect also decreases proportionally, maintaining the natural relationship between dry signal and processed signal. If the engineer mutes a channel, its effect disappears too.
Pre-fader vs. post-fader: the key decision
The point in the signal chain where the auxiliary bus taps its copy completely determines its behaviour:
- Pre-fader: The copy is taken before the channel fader. The level sent to the auxiliary is independent of the main fader position. Standard use: stage monitors and in-ear systems.
- Post-fader: The copy is taken after the channel fader. The level sent to the auxiliary follows the main fader movements. Standard use: effects (reverb, delay).
Confusing these modes is one of the most common errors in live sound. A monitor configured as post-fader will change level every time the engineer adjusts the FOH, which disorients the musicians during the performance. An effect configured as pre-fader will continue to sound even if the channel fader is at zero, producing reverb tails or echoes floating over the silence.
Inserts: in-line processing
An insert is a break point in the signal chain of a channel (or a subgroup) that allows an outboard processor to be placed directly in series. The signal leaves the channel towards the processor (send), is processed, and returns to the same channel at the break point (return). The original signal is completely replaced by the processed signal.
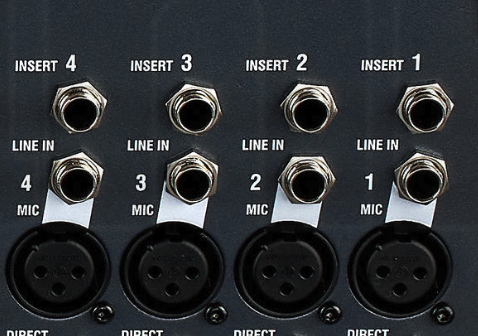
Unlike auxiliary sends — which work in parallel and blend dry signal with processed signal — the insert places the processor directly in the signal's exclusive path. Everything passing through that channel must pass through the inserted processor.
On stage, inserts are typically used for:
- Channel compressors: Inserting a rack compressor on the lead vocal channel to control dynamics before the signal reaches the main bus.
- Subgroup compressors: Inserting a compressor on the drum subgroup to add cohesion and glue to the entire kit.
- Outboard equalisers: Using a more precise rack EQ than the console's built-in equaliser on critical channels.
- Feedback suppression: Inserting dedicated feedback suppression processors on vocal channels or the main bus.
Direct outputs
A direct output is an individual tap available on each console channel that extracts that channel's signal independently, before it is mixed with other channels. It does not interrupt the channel's flow to the main bus: it is an additional derivation.
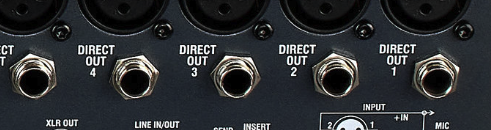
Its main uses in live sound are:
- Multitrack recording: Each channel is sent to an independent track on a recording system, allowing the concert to be mixed in post-production.
- Dedicated monitor console: In large productions, a separate console manages stage monitors exclusively. The direct outputs of the FOH console feed the inputs of that second desk, ensuring the monitor engineer receives all signals independently of the main console's auxiliary sends.
Practical routing organisation before the show
Setting up the routing before a show is not something to improvise: it is a preparation task that determines the engineer's ability to react during the performance. A well-routed console allows any unexpected issue to be managed with minimal fader movements.
The key routing decisions are:
- Channel assignment: Which instrument or microphone occupies each console channel. The common convention: drums in the first channels, then bass, guitars, keyboards, vocals and effect returns at the end.
- Subgroup assignment: Which channels are grouped together. This must be decided before soundcheck.
- Auxiliary assignment: How many monitors or in-ear systems there are, which auxiliary bus feeds each one and whether they run pre or post-fader.
- Insert points: Which channels or subgroups have outboard processors inserted.
- Labelling: Naming and labelling all channels, subgroups and auxiliaries on the console. On digital desks, saving the scene before starting. On analogue desks, using masking tape strips above the faders.
